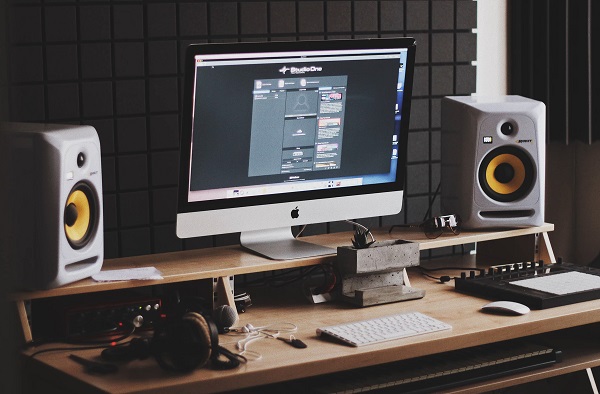
If you’re about to venture into audio production, you could be wondering how to use studio monitors. Unless you have some kind of background on these speakers, linking them might not be as straightforward as it may seem. There may be differences depending on the type of studio monitor you have and the devices you connect to.
For music producers starting their journey at home, it’s vital to know what cables to use when linking a studio monitor to a particular device. Connecting to DJ controllers, laptops, and personal computers may entail using different cables.

Knowing when you need an audio interface is essential, too. In this piece, we’ll walk you through the process of linking active monitors with pre-configured amps to different devices.
Table of Contents
Gadgets and Setups To Connect to Studio Monitors
There are many ways to connect powered speakers to a device or audio interface. Here are some of the simplest and most effective:
Studio Monitor and Laptop Sans Interface
A 3.5mm jack to a 2x XLR male connector is what allows you to connect a set of studio monitors to a personal computer or a laptop, sans audio interface. These cables come in various lengths, so make sure to pick one appropriate for your needs.
If even the longest option falls short, you may use an ordinary microphone cable to extend it. You’ll need two of these cables for a pair of speakers, one for each device. You may also use these cables for connecting studio monitors to a DJ setup.
Studio Monitor and Audio Interface
If you’re recording, you’ll likely need to link your studio monitor to an audio interface. It can be acquired either as an internal sound card built into a computer or a compact external device.
Unlike a regular sound card, an audio interface offers enhanced performance and more advanced options. It’s the ideal choice for professional-level audio production. An audio interface also has one or more input slots for synthesizers, microphones, guitars, or other external devices.
In most models, the standard inputs are RCA, XLR, or 6.35mm TRS jack. RCA and 6.35mm jack outputs also work for studio monitors. You’ll usually find XLR outputs on studio monitors of the more rugged variety.
DJ Controller or Mixer and Computer Speakers
A DJ mixer or controller can be amplified using your personal computer’s or laptop’s pre-configured speakers. To accomplish this, adjust the software settings so that the Master Output directs to the laptop’s built-in sound card. Note that a full dynamic sound isn’t necessarily guaranteed by these speaker types.
More than your choice of speaker, it’s your DJ-ing that contributes to the production of the perfect sounds. If built-in speakers are your choice for music production, seriously consider investing in a set of studio monitors.
More often than not, DJ controllers come built with a Master Output for linking to active speakers through RCA or XLR. A lot of models also have Booth Out cables for jack connectors.
Methods for Connecting Entry-Level Studio Monitors
Most beginner studio monitors have RCA inputs located at the back of one speaker and a wire connecting one speaker to the other. While this tends to limit connectivity options, it should be enough to get the speakers to work.
This is essential for helping you understand how linking between these devices is accomplished from the get-go. Here are some basic methods for linking entry-level powered speakers:
1. One-eighth to RCA Connector
If only RCA inputs are available in your beginner studio monitors, secure a one-eighth to RCA cable for converting the headphone jack’s stereo output to RCA. Once done, plug the said connector into the port of the headphone.
Then, proceed to link the jacks to the speakers. Remember, the red connector should always go to the right channel input.
2. One-eighth to One-fourth Cable
A few steps ahead of RCA connections are the one-fourth inputs, usually found in high-end monitors. This requires the same approach of finding a means to plug the headphone jack into a laptop or computer.
In this case, such can be achieved via a one-fourth red cable into the right speaker and a one-fourth black cable into the left one. A joint cable needs to be pulled apart at the one-fourth end to establish an efficient connection.
Why Use an Audio Interface
While it’s been established that studio monitors can be used in the absence of an audio interface, here are a few reasons you may not want to do so:
- A pair of balanced outputs that enhance audio quality
- Inputs for connecting a number of instruments to your computer
- Volume control knobs for convenience
Proper Connections Produce the Best Sounds
Knowing how to connect studio monitors via jack or RCA lets you produce quality sounds. More often than not, we recommend going for monitors with jack outputs, as these allow for more balanced connectivity. In other words, they are less susceptible to noise and other forms of interference.


